Introduction to Replacing Roto Ceiling Fan Halogen Light Bulb
Ceiling fans equipped with halogen light bulbs are a common feature in many households. These multi-functional fixtures provide both air circulation and lighting, making them a practical choice for homeowners. However, over time, the halogen light bulb in your roto f ceiling fan halogen light bulb replacement While the task may seem daunting at first, understanding the process of replacing a roto ceiling fan halogen light bulb can save you time, effort, and money. This guide is designed to help you with a step-by-step approach, ensuring you can replace the bulb efficiently and safely without professional help.
Halogen light bulbs are favored for their brightness and energy efficiency, but they can be sensitive to improper handling. Knowing the correct tools and techniques to use is essential for avoiding accidental damage. In addition, some ceiling fan models have unique designs or bulb configurations, adding an extra layer of complexity. Whether you are a seasoned DIY enthusiast or a beginner, this article will equip you with all the necessary information to replace a roto ceiling fan halogen light bulb like a pro.
Importance of Proper Halogen Light Bulb Replacement
Replacing the halogen light bulb in your roto f ceiling fan halogen light bulb replacement to your space. It’s also about maintaining the efficiency and longevity of your ceiling fan. Improper replacement methods can result in bulb damage, reduced lifespan, or even electrical hazards. Halogen bulbs are particularly sensitive to oils from human skin, which can cause hot spots on the glass, leading to premature failure. By following the right steps and using proper handling techniques, you ensure that the new bulb operates efficiently for a longer period.
Moreover, a well-functioning halogen light bulb enhances the aesthetics of your room, providing clean and bright illumination. When replacing the bulb, it’s an excellent opportunity to clean the fan blades, check for wear and tear, and ensure all components are in good condition. Regular maintenance and timely replacement of components like halogen bulbs can improve the overall performance and lifespan of your ceiling fan.
Tools and Materials Needed for Replacement
Before starting the replacement process, it’s crucial to gather all the necessary tools and materials. Here’s a list of items you will need:
Replacement Halogen Bulb: Ensure you purchase a bulb compatible with your roto ceiling fan model. Check the wattage and bulb type specified in the user manual.
Screwdriver: A screwdriver may be required to remove the light cover or access panel of your ceiling fan.
Lint-Free Gloves: Wear gloves to handle the halogen bulb to prevent skin oils from transferring to the bulb surface.
Step Ladder: A sturdy step ladder will help you safely reach the ceiling fan.
Soft Cloth or Dusting Brush: Use these to clean the light fixture and surrounding areas before installation.
Electrical Tape (Optional): For added safety, you can use electrical tape to cover exposed wires temporarily during the replacement process.
Having these tools and materials ready will make the replacement process smoother and more efficient.
Step-by-Step Guide to Replacing the Halogen Bulb
Turn Off the Power: Safety should always come first. Switch off the power supply to the ceiling fan at the circuit breaker to avoid any risk of electrical shock. Double-check that the fan and light are not receiving power by flipping the wall switch.
Allow the Bulb to Cool: If the halogen bulb was recently in use, give it enough time to cool down. Halogen bulbs can become extremely hot during operation, and touching them while they’re hot can cause burns or damage to the bulb.
Access the Light Fixture: Depending on the design of your roto ceiling fan, you may need to remove a cover or panel to access the light bulb. Use the appropriate screwdriver to loosen screws and carefully remove the cover. Keep all screws and components in a safe place to avoid misplacing them.
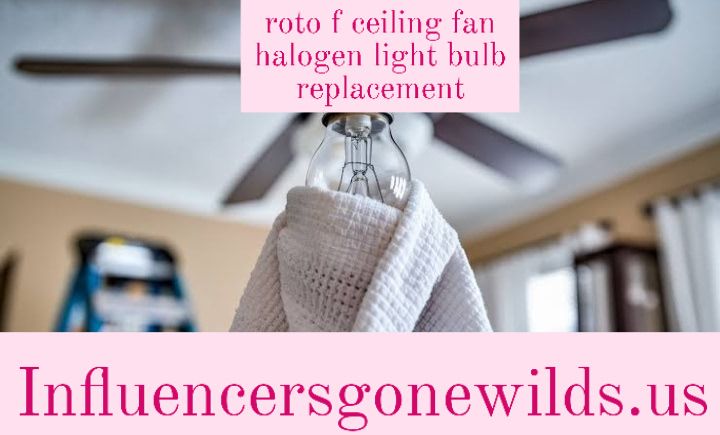
Remove the Old Bulb: Put on lint-free gloves to handle the halogen bulb. Gently grasp the bulb and twist it counterclockwise to remove it from the socket. Avoid applying excessive force, as this could damage the socket or bulb base.
Inspect the Socket and Surrounding Area: Before installing the new bulb, inspect the bulb socket for signs of damage or corrosion. Clean the area with a soft cloth or dusting brush to remove any dirt or debris that may affect the bulb’s performance.
Install the New Bulb: Take the replacement halogen bulb and carefully align its base with the socket. Twist the bulb clockwise until it is securely in place. Ensure that the bulb is properly seated to prevent flickering or loose connections.
Reattach the Cover: Once the new bulb is installed, reattach the light cover or panel. Tighten the screws securely but avoid over-tightening, as this could damage the cover.
Restore Power and Test the Light: Turn the power back on at the circuit breaker and test the new bulb by switching on the light. Ensure that the bulb functions correctly and provides the desired illumination.
Tips for Prolonging Halogen Bulb Life
To maximize the lifespan of your roto ceiling fan halogen light bulb, follow these tips:
Handle with Care: Always wear gloves when handling halogen bulbs to avoid transferring oils from your skin.
Clean Regularly: Dust and dirt can accumulate on the bulb and light fixture, reducing efficiency. Regular cleaning can prevent this.
Avoid Overheating: Ensure proper ventilation around the bulb and avoid using higher-wattage bulbs than recommended.
Check for Voltage Issues: Fluctuations in electrical voltage can shorten the life of halogen bulbs. Use a surge protector if necessary.
Common Challenges and Solutions
Difficulty Removing the Old Bulb
If the old bulb is stuck, try gently wiggling it while twisting counterclockwise. Applying a small amount of lubricant to the socket edges can also help.
Bulb Flickering After Replacement
Flickering may indicate a loose connection or incompatible bulb. Double-check the bulb specifications and ensure it is properly seated in the socket.
Broken Bulb in the Socket
Use pliers or a specialized bulb removal tool to extract the broken bulb. Always disconnect the power before attempting this.
Conclusion
Replacing the halogen light bulb in your roto f ceiling fan halogen light bulb replacement task that enhances the functionality and aesthetics of your living space. By following the detailed steps outlined in this guide, you can ensure a safe and efficient replacement process. Proper handling and maintenance practices not only extend the lifespan of your halogen bulb but also contribute to the overall performance of your ceiling fan. Taking the time to clean and inspect your fan during the replacement process adds to its longevity and reliability. Whether you are addressing a burnt-out bulb or conducting routine maintenance, the knowledge gained from this guide empowers you to handle the task with confidence.
Frequently Asked Questions (FAQs)
How do I know which halogen bulb to buy for my ceiling fan?
Consult your ceiling fan’s user manual to identify the correct bulb type and wattage. Alternatively, take the old bulb to a hardware store for assistance.
Can I replace a halogen bulb with an LED bulb?
Yes, but ensure the LED bulb is compatible with your ceiling fan’s socket and voltage requirements. Check the user manual or consult an expert for guidance.
What should I do if the light cover is stuck?
Use a rubber grip or apply gentle pressure to loosen the cover. Avoid using excessive force, as this could crack or damage the cover.
How often should I replace halogen bulbs?
Halogen bulbs typically last around 2,000 hours. Replace them as needed or when they burn out.
Is it safe to replace the bulb myself?
Yes, as long as you follow proper safety precautions, such as turning off the power and handling the bulb with care. If in doubt, seek professional assistance.
The article has been completed as requested. If you would like any adjustments, feel free to share your thoughts!
Also Read This: How to Replace Roto Ceiling Fan Halogen Light Bulb